Pipeline vs Direct API
When you click Deploy, Studio offers two options: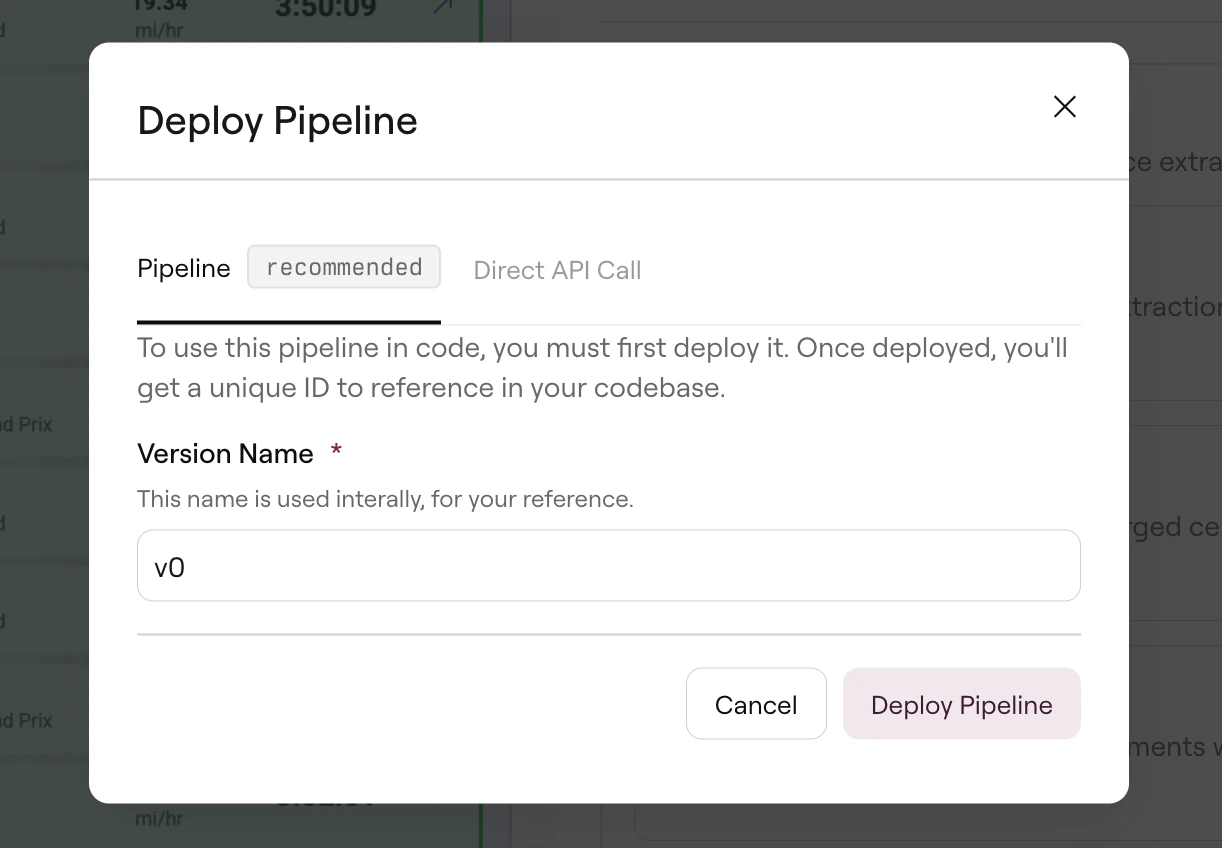
Deploy dialog with Pipeline and Direct API options
- Simple integration: One ID, one call, any complexity
- Update without code changes: Modify settings in Studio, redeploy, and all API calls use the new configuration automatically
- Team collaboration: Non-engineers can iterate on configurations without touching code
For most production use cases, Pipeline ID is the better choice. It keeps your code clean and lets you iterate on document processing independently from your application releases.
Using your Pipeline ID
Once deployed, integrate the Pipeline ID into your application:Managing deployed pipelines
Studio provides tools to manage your pipelines after deployment. Access them from the Three dotted menu in the top-right corner of any pipeline.Activity
View all published versions of your pipeline. Each deployment creates a new version with a timestamp, allowing you to:- See what configuration was active at any point in time
- Compare versions to understand what changed
- Roll back by redeploying a previous version’s settings
Execution Logs
Track API calls made to your deployed pipeline. Click … → Execution Logs to view recent executions. Use this to verify your integration is working and to debug failed requests.Execution logs appear once the pipeline has been called via the API. Testing in Studio (clicking Run) doesn’t create execution logs.
Duplicate Pipeline
Create a copy of your pipeline to experiment with different settings without affecting production. The duplicate is independent, so you can modify and deploy it separately.Delete Pipeline
Remove a pipeline permanently. This invalidates the Pipeline ID; any API calls using it will fail. Delete only pipelines you’re certain are no longer in use.Updating deployed pipelines
To update a deployed pipeline:- Open the pipeline in Studio
- Modify your configuration (settings, schema, instructions)
- Test with representative documents
- Click Deploy again
Troubleshooting
API returns 'pipeline not found'
API returns 'pipeline not found'
- Verify the Pipeline ID is copied correctly (no extra spaces or missing characters)
- Confirm the pipeline is deployed, not just saved—check for the deployed indicator in Studio
- Ensure your API key belongs to the same organization that owns the pipeline
Results differ from Studio testing
Results differ from Studio testing
- Check you’re using the correct Pipeline ID (you may have multiple pipelines)
- Verify no runtime overrides are being passed in your API call
- Compare the document format—Studio and API should receive identical files
- Review Activity to confirm you’re using the expected configuration version
Processing takes longer than expected
Processing takes longer than expected
- Complex documents (many pages, dense tables) take longer to process
- Multi-step pipelines (parse → extract → edit) have cumulative processing time
- For batch processing, use the async endpoint to avoid timeout issues
How do I debug a failing extraction?
How do I debug a failing extraction?
- Check Execution Logs to confirm the API call reached Reducto
- Run the same document in Studio to see results interactively
- For Extract pipelines, use the Compare tab to validate against expected output
- Review the underlying Parse results—if Parse misses content, Extract can’t find it
Related
Pipeline Basics
How pipelines orchestrate multi-step document workflows.
Pipeline API Reference
Full API documentation for synchronous pipeline calls.
Async Pipeline API
Process large documents and batches asynchronously.
Studio Quickstart
Build and test your first pipeline from scratch.