> ## Documentation Index
> Fetch the complete documentation index at: https://docs.reducto.ai/llms.txt
> Use this file to discover all available pages before exploring further.
# Parse Pipeline
> Turn documents into structured data in Studio
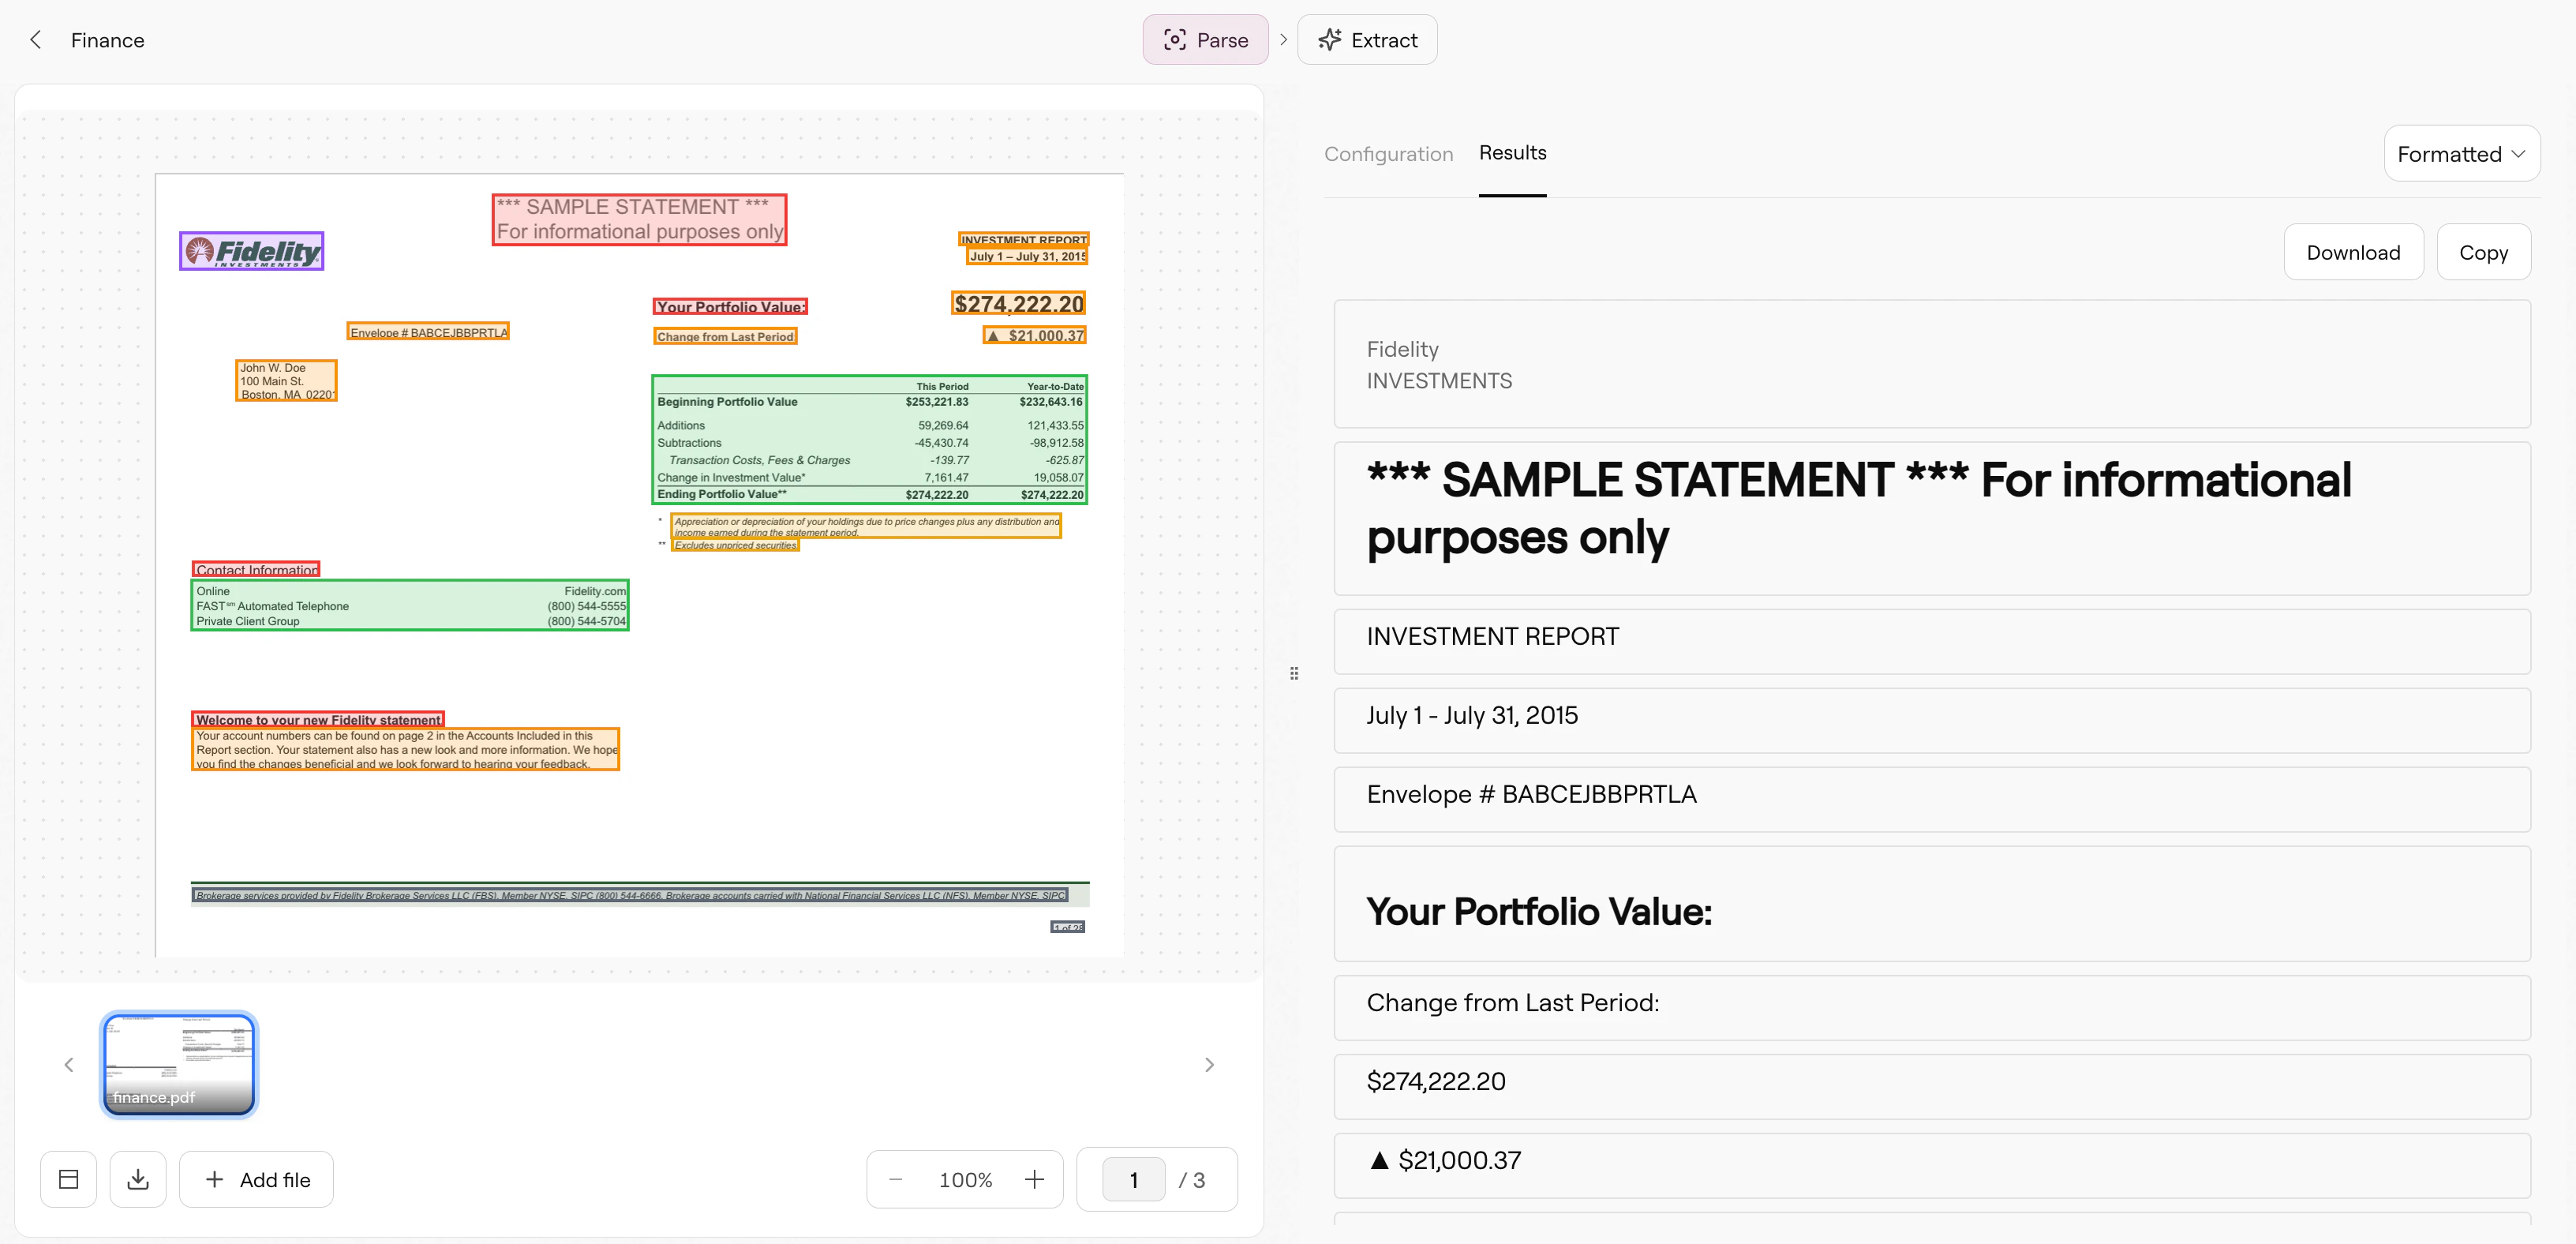
Parse converts documents into structured data. It identifies text blocks, tables, figures, headers, and key-value pairs, returning everything as markdown with coordinates for each element. The output is designed for downstream processing—whether that's feeding an LLM, building a search index, or piping into Extract for structured data extraction.
 ## What Parse extracts
Parse breaks your document into **chunks**, each representing a semantic unit of content:
* **Text blocks**: Paragraphs and body text, preserving reading order across columns
* **Tables**: Structured data with rows and columns, output as markdown, HTML, or JSON
* **Figures**: Images, charts, and diagrams with optional AI-generated descriptions
* **Headers**: Section titles with hierarchy levels for document structure
* **Key-value pairs**: Form-like content where a label maps to a value
* **Footers**: Page numbers, disclaimers, and repeated bottom-of-page content
Each chunk includes bounding box coordinates linking it back to its source location. In Studio, these appear as colored overlays on your document:
## What Parse extracts
Parse breaks your document into **chunks**, each representing a semantic unit of content:
* **Text blocks**: Paragraphs and body text, preserving reading order across columns
* **Tables**: Structured data with rows and columns, output as markdown, HTML, or JSON
* **Figures**: Images, charts, and diagrams with optional AI-generated descriptions
* **Headers**: Section titles with hierarchy levels for document structure
* **Key-value pairs**: Form-like content where a label maps to a value
* **Footers**: Page numbers, disclaimers, and repeated bottom-of-page content
Each chunk includes bounding box coordinates linking it back to its source location. In Studio, these appear as colored overlays on your document:
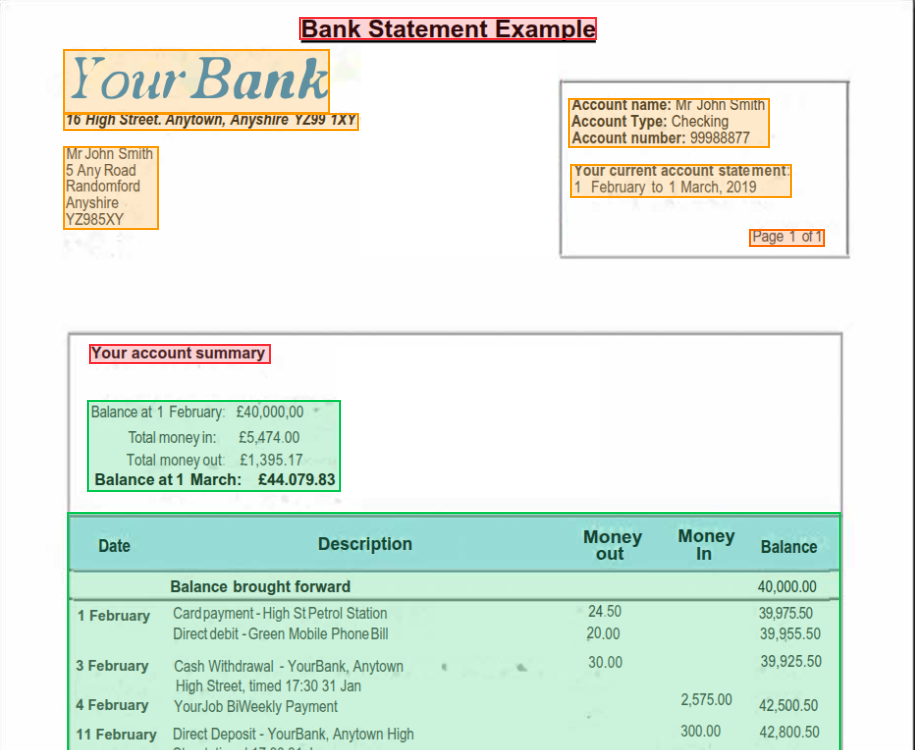 Click any box to jump to its output, or click output text to highlight its source.
## When to adjust configurations
The default configuration handles most documents well. The **Configurations** tab contains the whole list of available configurations, split into 5 buckets:
**Enhance** — Enable agentic processing when results aren't parsing correctly or text has OCR errors. Agentic adds a vision model pass to verify and correct processing results. This increases accuracy, but also cost and latency.
**Retrieval** — Configure chunking for RAG pipelines. The default may produce segments too large or small for your embedding model. Set chunking mode to `variable` with a target size around 500-1000 characters.
**Formatting** — Control output structure. Switch table format to `html` or `json` for programmatic use. Formatting also includes configurations for detecting attributes like change tracking, hyperlinks, highlights, and more.
**Spreadsheet** — Handle Excel and CSV files. Control inclusions of cell colors, formulas, dropdowns, and hidden items in your outputs, as well as table clustering detection.
**Settings** — Core processing controls such as specifying page ranges, returning images, and forcing a URL result.
See [Parse Configurations](/configs/overview) for the complete reference.
## Working with results
The Results tab shows parsed output as formatted markdown by default. The toolbar offers several options:
* **Copy** — Copy the output to your clipboard
* **Download** — Save results as a file
* **JSON** — Toggle to see the raw API response structure
The JSON view is useful for understanding exactly what your code will receive. Each chunk includes:
```json theme={null}
{
"type": "text",
"content": "Your extracted text here...",
"bbox": {
"left": 0.05,
"top": 0.12,
"width": 0.4,
"height": 0.03,
"page": 0
}
}
```
Bounding boxes use normalized coordinates (0-1 range relative to page dimensions), making them consistent across different document sizes.
## Processing multiple files
Studio supports batch processing. Add multiple files using the **Add file** button in the file carousel, then check **All Files** before clicking Run to process the entire batch with your current configuration.
This is helpful for testing configurations across a representative sample before deploying. If results vary significantly across documents, you may need to adjust settings or consider whether a single pipeline can handle your document variety.
## From Parse to Extract
Parse alone gives you the document's content and structure. If you need specific fields—invoice totals, contract dates, patient names—add an **Extract** step. Click **Add** in the pipeline header to chain Parse → Extract, creating a multi-step pipeline you can deploy with a single Pipeline ID.
See [Extract Pipeline](/studio-extract) for schema configuration.
***
## Related
API reference and response schema.
All configuration options with examples.
Click any box to jump to its output, or click output text to highlight its source.
## When to adjust configurations
The default configuration handles most documents well. The **Configurations** tab contains the whole list of available configurations, split into 5 buckets:
**Enhance** — Enable agentic processing when results aren't parsing correctly or text has OCR errors. Agentic adds a vision model pass to verify and correct processing results. This increases accuracy, but also cost and latency.
**Retrieval** — Configure chunking for RAG pipelines. The default may produce segments too large or small for your embedding model. Set chunking mode to `variable` with a target size around 500-1000 characters.
**Formatting** — Control output structure. Switch table format to `html` or `json` for programmatic use. Formatting also includes configurations for detecting attributes like change tracking, hyperlinks, highlights, and more.
**Spreadsheet** — Handle Excel and CSV files. Control inclusions of cell colors, formulas, dropdowns, and hidden items in your outputs, as well as table clustering detection.
**Settings** — Core processing controls such as specifying page ranges, returning images, and forcing a URL result.
See [Parse Configurations](/configs/overview) for the complete reference.
## Working with results
The Results tab shows parsed output as formatted markdown by default. The toolbar offers several options:
* **Copy** — Copy the output to your clipboard
* **Download** — Save results as a file
* **JSON** — Toggle to see the raw API response structure
The JSON view is useful for understanding exactly what your code will receive. Each chunk includes:
```json theme={null}
{
"type": "text",
"content": "Your extracted text here...",
"bbox": {
"left": 0.05,
"top": 0.12,
"width": 0.4,
"height": 0.03,
"page": 0
}
}
```
Bounding boxes use normalized coordinates (0-1 range relative to page dimensions), making them consistent across different document sizes.
## Processing multiple files
Studio supports batch processing. Add multiple files using the **Add file** button in the file carousel, then check **All Files** before clicking Run to process the entire batch with your current configuration.
This is helpful for testing configurations across a representative sample before deploying. If results vary significantly across documents, you may need to adjust settings or consider whether a single pipeline can handle your document variety.
## From Parse to Extract
Parse alone gives you the document's content and structure. If you need specific fields—invoice totals, contract dates, patient names—add an **Extract** step. Click **Add** in the pipeline header to chain Parse → Extract, creating a multi-step pipeline you can deploy with a single Pipeline ID.
See [Extract Pipeline](/studio-extract) for schema configuration.
***
## Related
API reference and response schema.
All configuration options with examples.